Hosting a Two-Tier Flask Application with MySQL Database Using Docker Compose 👨💻🐳

👋 Hello! I'm passionate about DevOps and have over 1+ years of experience in the field. I'm proficient in a variety of cutting-edge technologies and always motivated to expand my knowledge and skills. Let's connect and grow together!
SKILLS:
🔹 Languages & Runtimes: Python, Shell Scripting, HCL, YAML 🔹 Cloud Technologies: AWS, Microsoft Azure, GCP 🔹 Infrastructure Tools: Docker, Terraform, AWS CloudFormation 🔹 Other Tools: Linux, Git and GitHub Actions, Jenkins, Jira, GitLab (beginner), Docker, AWS DevOps 🔹 Web Development: HTML, CSS, Bootstrap, Python, SQL
Job & Responsibilities:
🚀 Improved development efficiency by implementing CI/CD pipelines, resulting in a 30% reduction in deployment time on the test server. 🔒 Strengthened deployment and testing reliability by utilizing Docker containers and optimizing Dockerfile, reducing development issues on the test server by 20%. ⚙️ Automated S3 bucket log creation with Shell scripting, eliminating 100% of manual search and saving 2 hours per week. 📅 Scheduled EC2 instance start/stop using Lambda functions and Event Bridge, leading to a 25% decrease in infrastructure costs. 🔧 Utilized AWS, Linux, Python, Docker, Shell scripting, Terraform, Jenkins Pipelines, and automation to streamline workflows and improve overall system performance.
I'm very detail-oriented and possess strong written and verbal communication skills. As a high performer with a possibility mindset, I strive to solve problems using efficient approaches.
Let's Connect & Grow:
If you find my profile suitable for the role you are searching for, please feel free to reach out to me at sumanprasad9766@gmail.com.
📍 Introduction:
In this tutorial, we will guide you through the process of hosting a two-tier Flask application with a MySQL database using Docker Compose. This architecture allows you to separate your frontend (Flask application) from your backend (MySQL database) and deploy them together using containers. We assume you have a basic understanding of Git, Docker, and Python. Let's get started! 🚀
🔍Prerequisites 🛠️
Before we dive in, make sure you have the following prerequisites in place:
Basic understanding of Git, Docker, and Python.
Open port 5000 from your inbound rule (security group) of the server
Docker is installed and running on your system. You should also be added to the Docker group to execute Docker commands without
sudo.Internet connectivity to clone the GitHub repository and download Docker images.
Step 1: Clone the Repository 📂
Let's start by cloning the repository containing the source code for our two-tier application. Open your terminal and execute the following commands:
git clone https://github.com/sumanprasad007/two-tier-flask-app.git

cd two-tier-architecture-flask-application-with-mysql-database
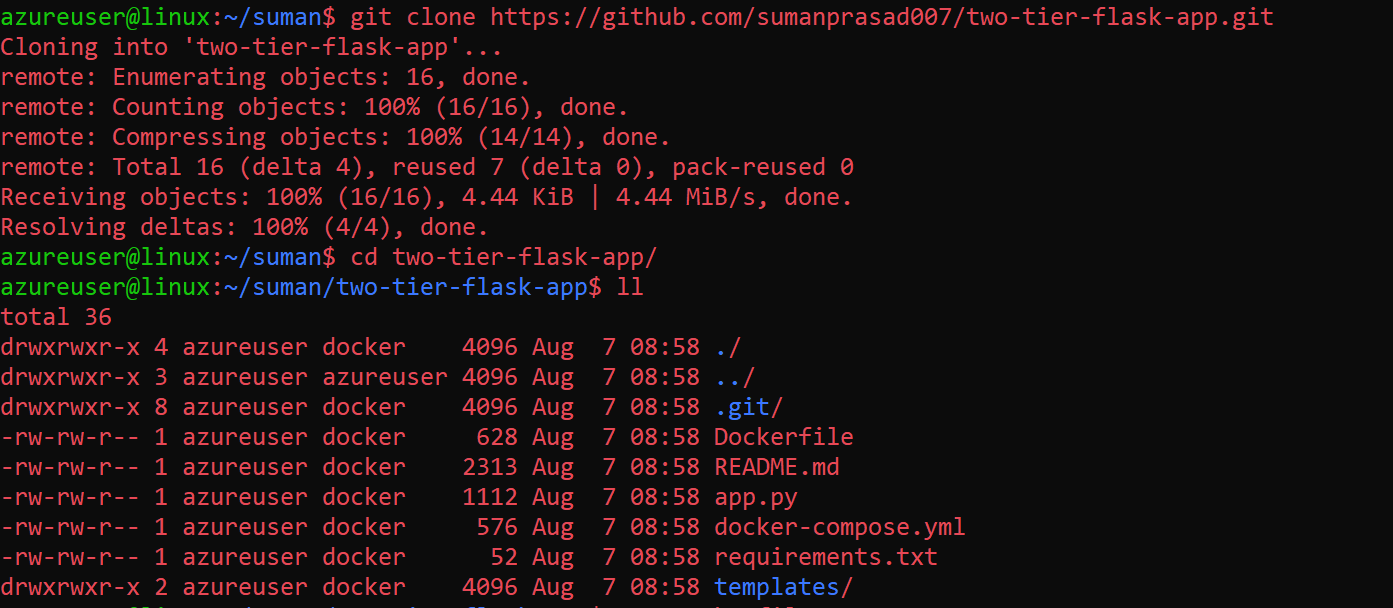
You're now ready to dive into the project!
Step 2: Install Docker Compose 🐋
If you haven't already installed Docker Compose, no worries! Run this command to install it:
sudo apt install docker-compose -y
Docker Compose will help us manage our multi-container application effortlessly.
Step 3: Start the Application with Docker Compose 🚢
Now, let's use Docker Compose to start our two-tier application. Execute this command in the terminal:
docker-compose up -d
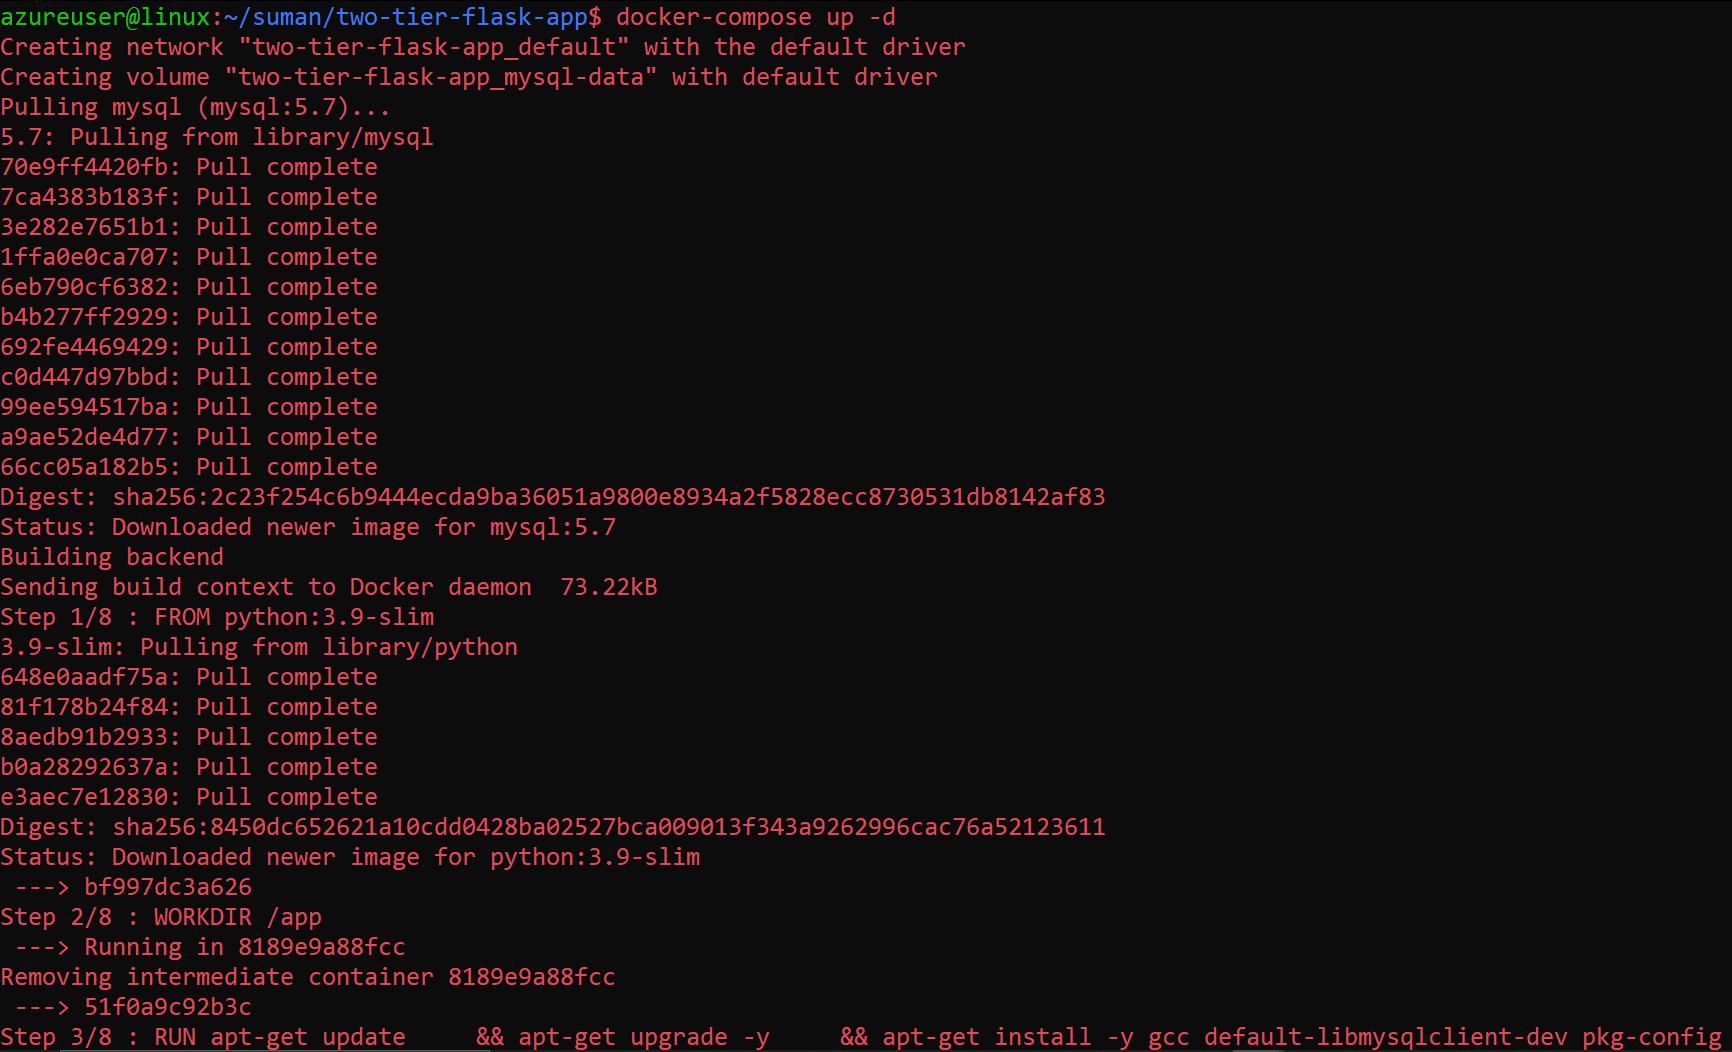
This command will create and start the containers defined in the docker-compose.yml file in detached mode. Smooth sailing ahead! ⛵
Step 4: Verify Containers 🕵️♂️
To make sure everything is up and running, execute the following command:
docker ps
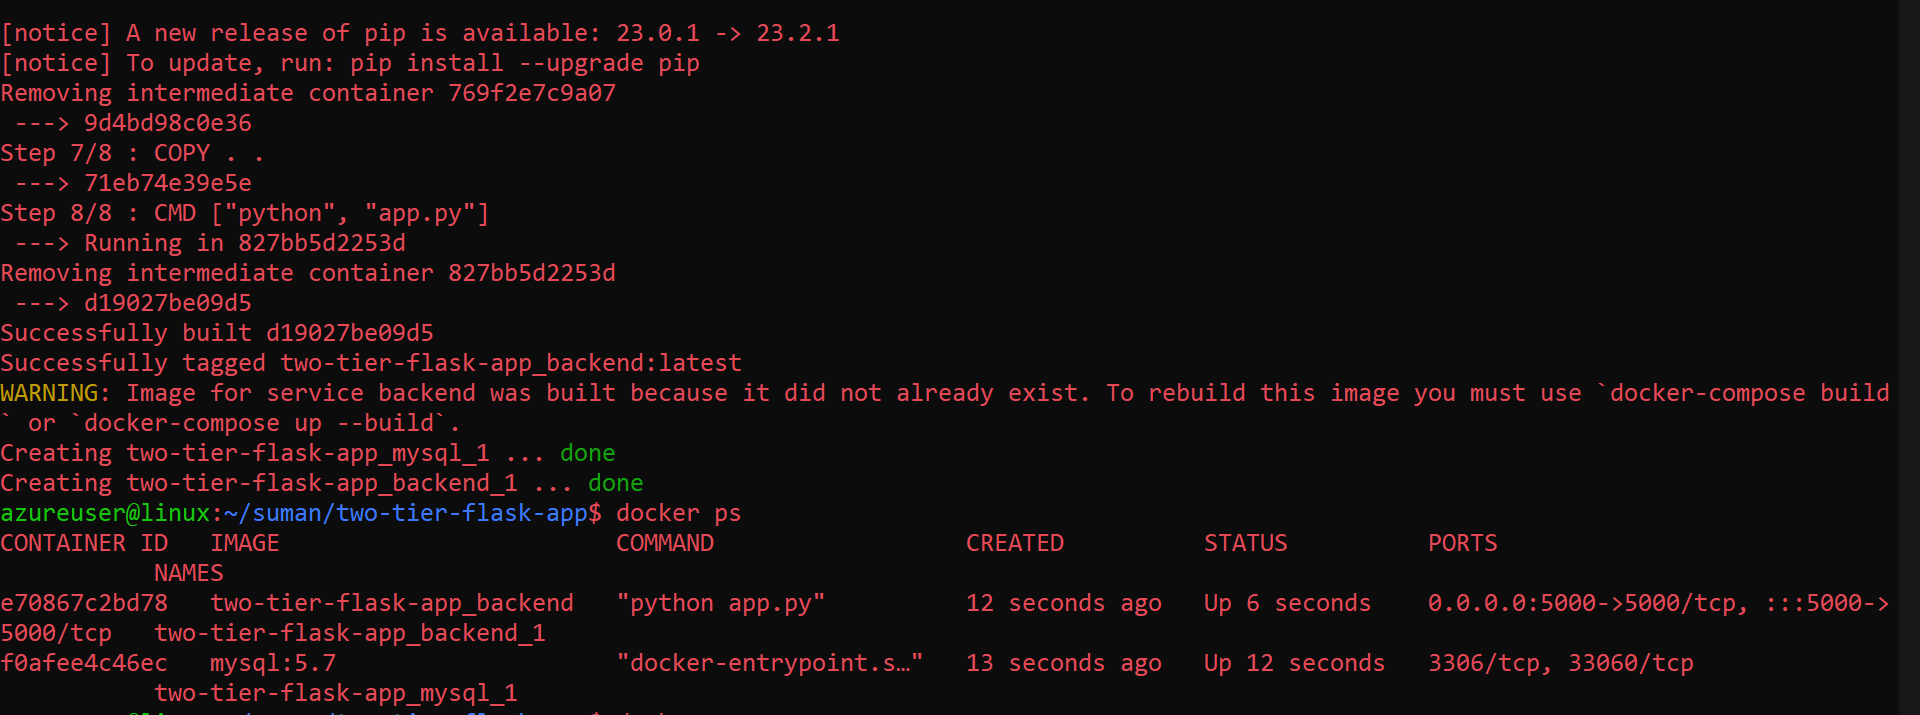
This will display a list of running containers. Keep an eye out for any issues!
Step 5: Create a MySQL Data Volume 🗄️
Now, let's create a data volume to store the MySQL data. Run this command:
sudo mkdir /var/lib/mysql/
Our data will be securely stored and ready for action.
Step 6: Access MySQL Database 💾
Time to dive into the MySQL database running in the container. First, find the container name using the docker ps command. Then, use the following command to access the MySQL shell:
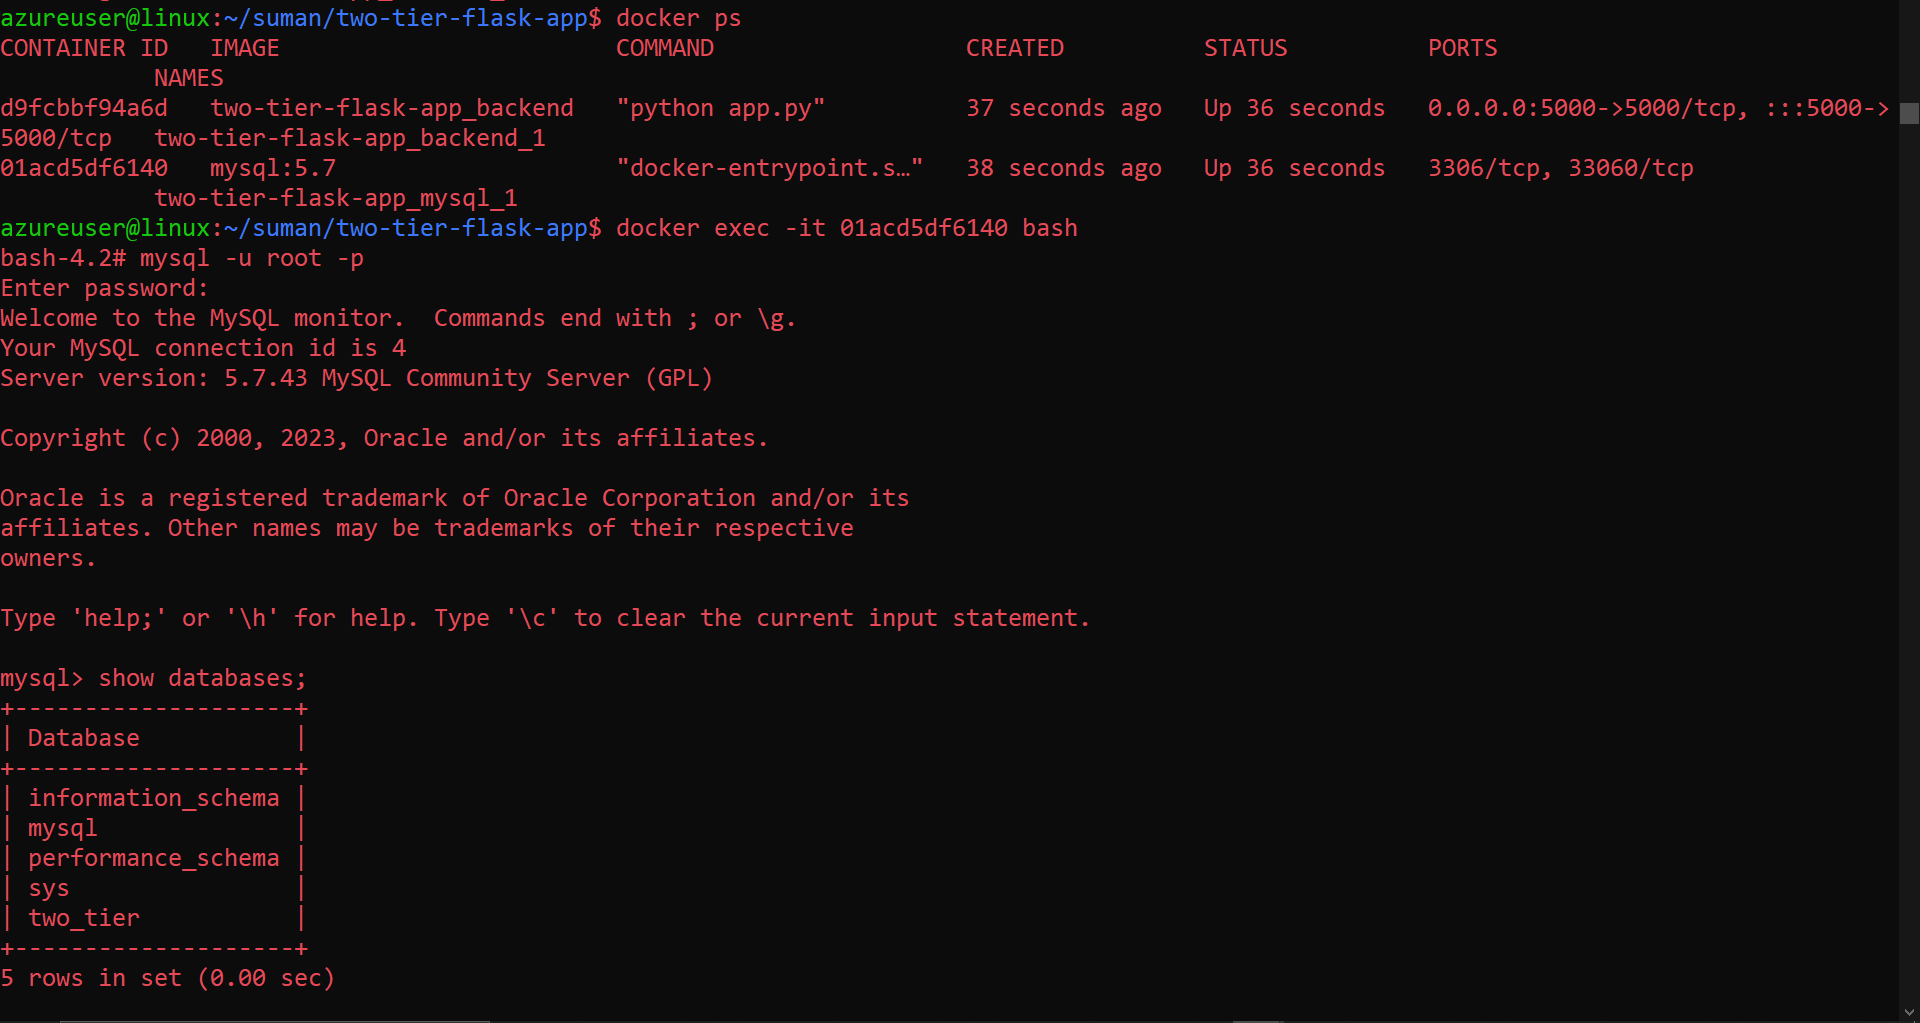
docker exec -it CONTAINER_NAME bash

mysql -u root -p
Step 7: Creating table messages along with column
You'll need to enter the MySQL root password. Once logged in, execute these SQL commands to interact with the database:
use two_tier;

show tables;

create table messages (message varchar(255));

describe messages;
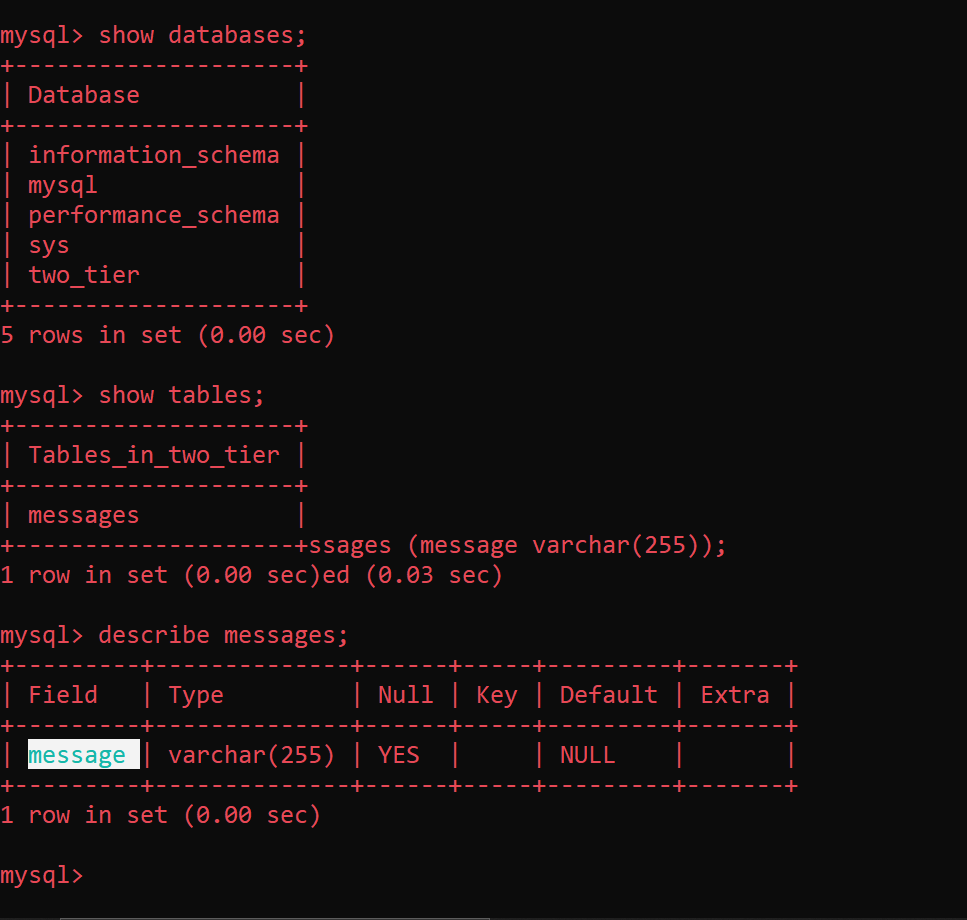
You're now in control of your database schema!
Step 8: Access the Application 🌐
To witness your Flask application in action, open a web browser and enter the following URL:
http://PUBLIC_IP_OF_SERVER:5000
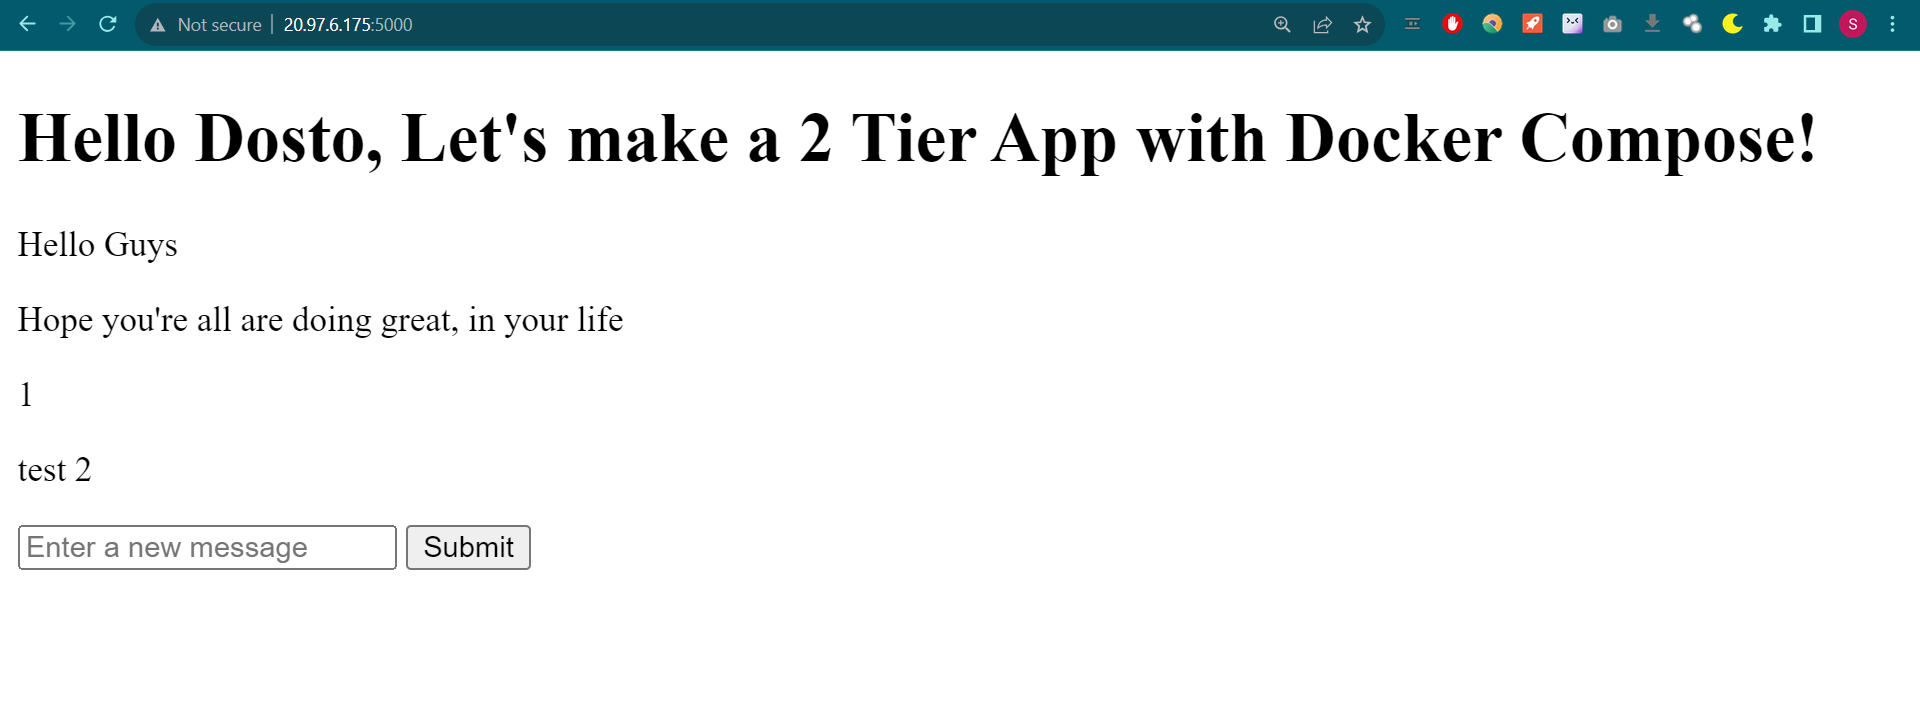
Replace PUBLIC_IP_OF_SERVER with the actual public IP address of your server. Enjoy the view of your hard work!
Conclusion 🎉
Congratulations! You've successfully hosted a two-tier Flask application with a MySQL database using Docker Compose. 🎈 This architecture gives you the power to manage your application components as isolated containers, ensuring scalability and maintainability. Remember, this tutorial provides a basic setup. In a production environment, consider additional factors like security, data backup, and container orchestration.
Feel free to explore and modify the source code to build more advanced features on top of this foundation. Happy coding! 💻🌟
🔍 Checkout GitHub Repository for projects:
🔍 Check out my YouTube channel - Prasad Suman Mohan: